
Arizona · Superstition Mountains · Vertical video
Weavers Needle from Fremont Saddle: Hiking & Photo Tips
A photo-led look at Weavers Needle from Fremont Saddle, with a Peralta Trail hiking option, preparation advice, and practical desert photography tips.

Vertical video · Watch on TikTok
Along the Way
In this story.
A photo-led look at Weavers Needle from Fremont Saddle, with a Peralta Trail hiking option, preparation advice, and practical desert photography tips.
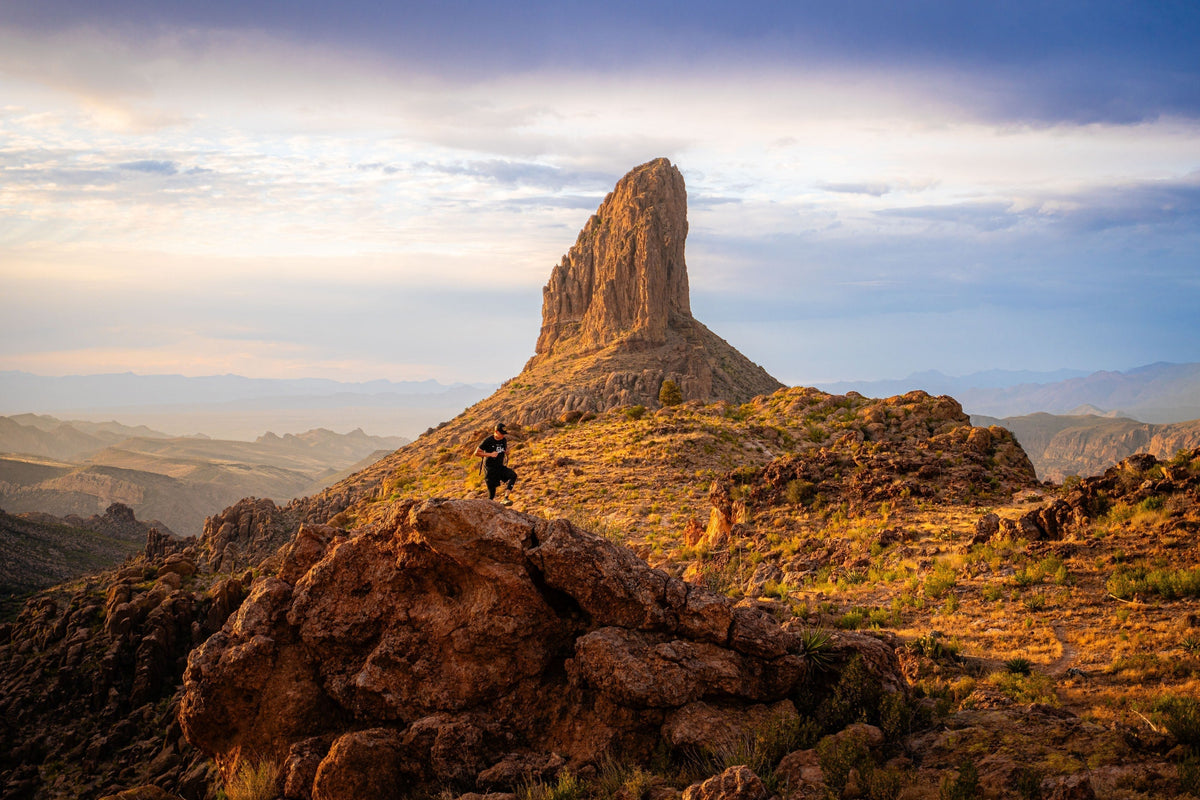
Fremont Saddle, overlooking Weavers Needle, is one of my favorite Arizona hikes. If you are planning a visit to the Superstition Mountains, here is a starting point: a hiking option to reach the view, what to prepare for, and a few ways to photograph the landscape alongside my photos and trail video.
Weavers Needle is the big landmark, but the canyon walls, foreground rocks, and layers of mountains give you plenty to notice along the way. You do not need to come home with only one photograph of the final view.
Where to see Weavers Needle: Fremont Saddle
For a hiking option with a view of Weavers Needle, consider Peralta Trail to Fremont Saddle in the Superstition Mountains, east of Phoenix. The saddle is a viewpoint, not the summit of the Needle.
Arizona Highways lists this out-and-back as 4.4 miles round trip, rated moderate, with elevations from 2,401 to 3,751 feet. That is about 1,350 feet of elevation difference, so plan for an uphill hike rather than a flat viewpoint walk. Its Peralta Trail guide uses Fremont Saddle as the turnaround; the full Peralta Trail continues beyond it.
This is an option for planning your own visit, not a measured account of my trip. Check the actual route you choose, particularly if adding side trips. Do not treat a search result for a Weavers Needle summit route as instructions for this viewpoint hike.
What to expect on the trail
Expect an uphill canyon hike with rocky footing. The Forest Service specifically notes that sections between Peralta Trailhead and Fremont Saddle reach bedrock and can be difficult underfoot. Wear footwear with dependable traction, and leave time for the descent as well as the climb. Forest Service Peralta trail sheet.
For planning, bring drinking water for the whole outing, food, sun protection, a route map available offline, and a charged phone. A headlamp and an extra layer are useful backups, especially if photography slows you down. Do not let camera gear crowd the essentials out of your backpack.
Choose a day and start time around the forecast. Cooler conditions are a better starting point than trying to fit this hike into a hot afternoon. An early start does not make extreme heat safe; be willing to postpone. The National Weather Service's Arizona hiking heat guidance is a useful preparation check.

Weavers Needle photography tips
Try making a small set of photographs rather than repeating the same frame. A wide landscape, a closer view of the rock, and a trail detail tell different parts of the outing.
- Start with the scale. Include the surrounding ridges so the Needle has context. A companion safely on the trail can give the scene a human reference without filling the whole frame.
- Keep the outline clear. Check whether a foreground person, branch, or boulder overlaps the Needle. A small adjustment from your safe standing position can separate those shapes.
- Check bright areas. Sunlit rock and a bright sky can lose detail before the shaded canyon does. Use your camera's exposure preview or your phone's exposure control, then check the result.
- Take the trail photograph too. The walls, texture, and changing light help explain what the hike feels like. Stop in a safe place before handling the camera, and keep the path clear for other hikers.
A phone is enough to try these ideas. Start at its normal wide setting; use zoom only when it helps isolate something specific. The composition matters more than carrying every lens you own.

Working with desert light
Warm light can bring out the color of the rock; softer cloud cover can make it easier to hold detail across the sky and landscape. These photographs show both the big scene and closer foreground elements. Use the light you have rather than assuming every visit will look the same.
Look for a foreground rock or plants already visible from the trail. Keep them low in the frame or around the edges so they lead into the scene rather than hide the Needle. You can also simplify: leave more sky around the formation and let its shape carry the photograph.
If you plan around sunrise or sunset, allow for the entire return journey and carry a light. Do not stretch the outing to chase color when the weather or remaining daylight no longer fits your plan. Storm clouds can look dramatic, but thunderstorms and flash flooding are reasons to change plans, not stay for another frame. NWS monsoon safety.

Quick answers before you go
Is this a hike to the top of Weavers Needle? No. This post focuses on the view from Fremont Saddle. It does not provide summit climbing or scrambling instructions.
Is Fremont Saddle an easy walk? The cited Peralta option is moderate, with an uphill climb and rocky footing. Distance alone does not tell you whether it suits your ability; consider the terrain, weather, and energy needed to get back.
Do you have to continue beyond the saddle? No. Fremont Saddle is the turnaround in the route guide linked above. Extra viewpoints and longer routes need their own planning, not just extra time at the end.
Where should you check current access? Start with Tonto National Forest recreation information and the individual trailhead listing. The Forest Service warns that conditions can change faster than website status updates. Confirm access and the approach-road conditions before driving out; this post does not guarantee that a route is open.

For a different desert landscape to photograph, read my Bryce Canyon viewpoints and photography post. You can find more photo-led trip stories in Along the Way.
More Along the Way
Keep exploring.
All stories ↗
South Falls at Silver Falls State Park: An Oregon Waterfall Day Trip
A South Falls-focused day visit to Silver Falls State Park during our Allegiant-supported Oregon trip, with walk-behind waterfall views and practical planning notes.
Read the story
Sea Lion Caves in Florence, Oregon: What to Expect on a Visit
The cave opening and Oregon coastline.Our Oregon Coast stop included sea lions on the rocks, time inside the cave, coastal viewpoints and a few favorite...
Read the story
Some of My Favorite Dana Point Photo Locations
Coastal viewpoints, harbor walks and sunset light at some of my favorite Dana Point photo locations, with notes on our hotel and food stops.
Read the story